Connecting your Bybit account to SquidPay via an API key empowers you to seamlessly manage your crypto portfolio and execute trades directly from our platform without ever exposing your login credentials. By following this guide to configure specific read-write permissions, you will enable SquidPay to automate and facilitate smooth fiat-to-crypto conversions (including P2P orders). Furthermore, this secure integration allows for seamless asset transfers between your Bybit main and subaccounts, giving you comprehensive control over your portfolio within the SquidPay ecosystem, all while maintaining the highest level of security through IP whitelisting and strictly disabled withdrawal permissions.
Prerequisites #
- An active Bybit account.
- Two-Factor Authentication (2FA) enabled via Google Authenticator (required for API creation).
Step-by-Step Instructions #
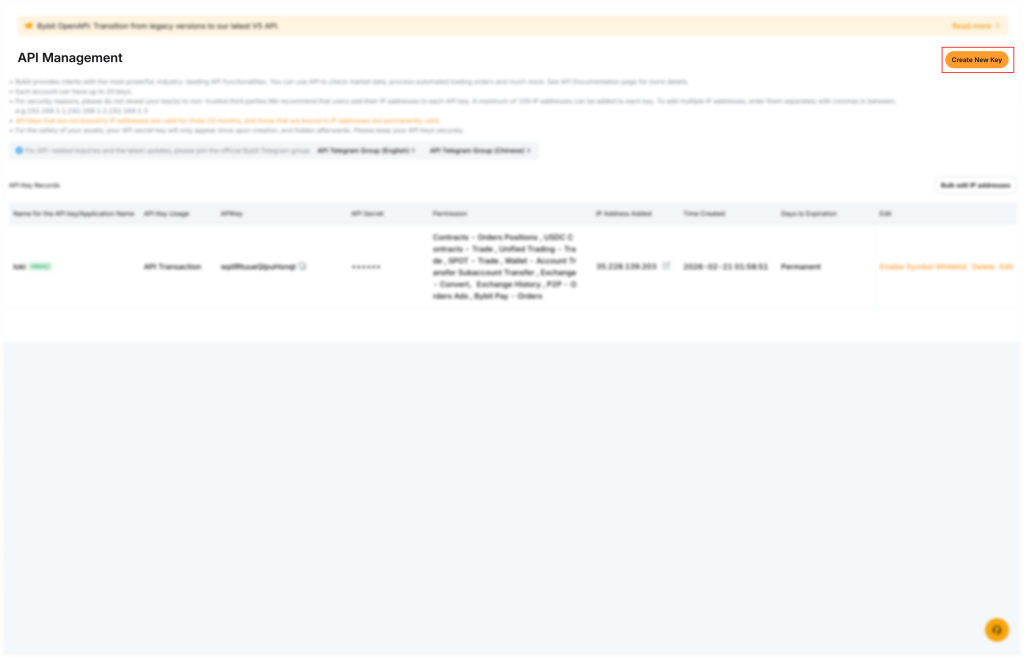
Step 1: Navigate to API Management #
- Log in to your Bybit account on a desktop browser and navigate to the API Management dashboard.
- Locate and click the Create New Key button in the upper right corner.
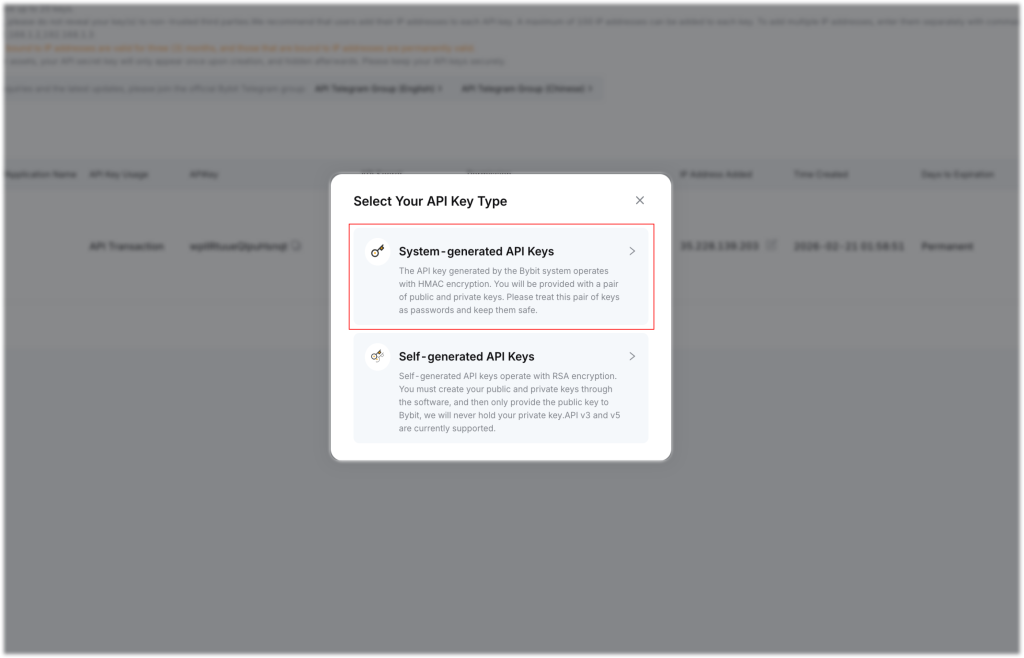
Step 2: Select API Key Type #
- A pop-up window will appear asking you to select your API key type.
- Click on System-generated API Keys.
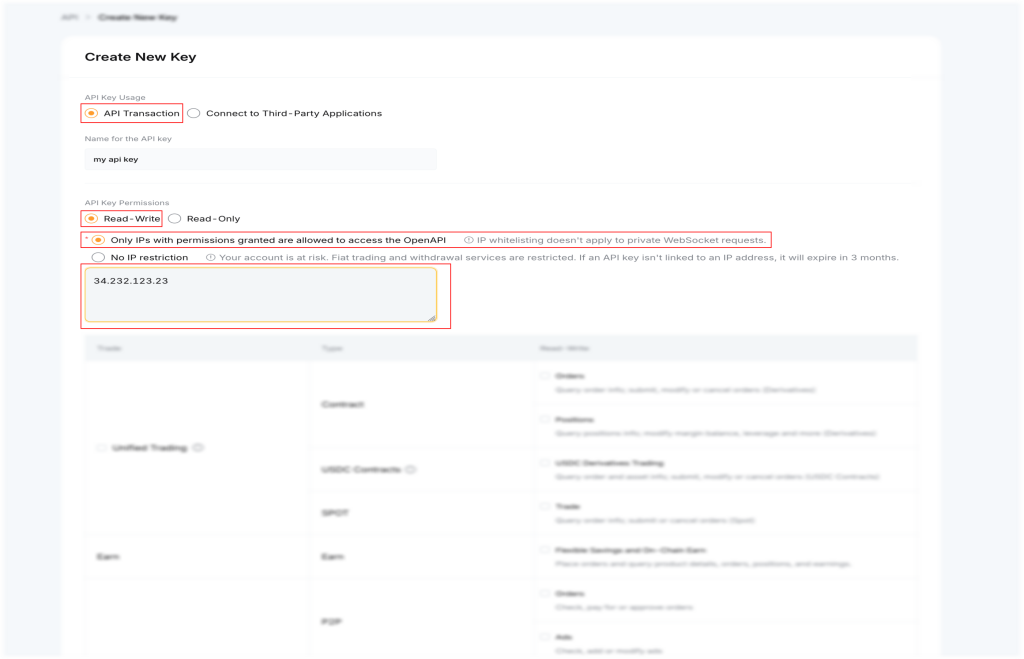
Step 3: Configure Basic Key Settings #
On the “Create New Key” screen, you will need to set up how the API connects to your chosen application.
- Under “API Key Usage”, select the API Transaction radio button.
- Enter a recognizable name for your key in the “Name for the API key” field.
- Under “API Key Permissions”, select the Read-Write option.
- To secure your connection, check the box for Only IPs with permissions granted are allowed to access the OpenAPI.
- Enter the designated IP address provided by your third-party application (for example,
34.232.123.23) into the text box below.
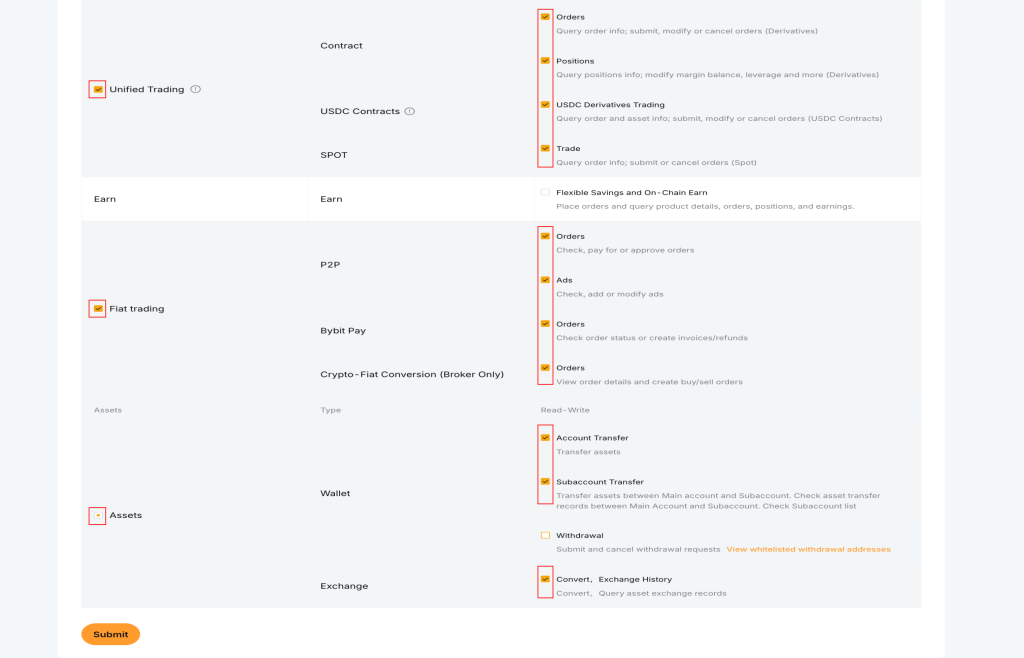
Step 4: Set Specific API Permissions #
Scroll down to configure the exact read-write permissions the application needs. Ensure the following boxes are checked:
- Unified Trading: Check the main box to enable these permissions.
- Check Orders (Contract).
- Check Positions (Contract).
- Check USDC Derivatives Trading (USDC Contracts).
- Check Trade (SPOT).
- Fiat trading: Check the main box to enable these permissions.
- Check Orders (P2P).
- Check Ads (P2P).
- Check Orders (Bybit Pay).
- Check Orders (Crypto-Fiat Conversion).
- Assets: Check the main box to enable these permissions.
- Check Account Transfer (Wallet).
- Check Subaccount Transfer (Wallet).
- Check Convert, Exchange History (Exchange).
- Security Note: Leave the “Withdrawal” checkbox unchecked to protect your funds.
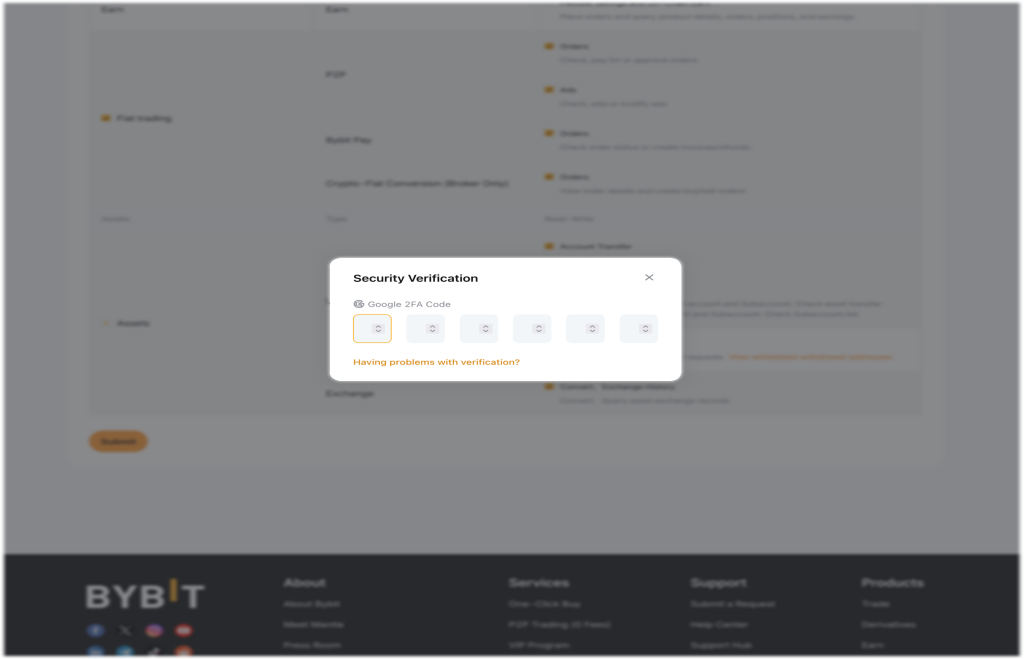
Step 5: Submit and Authenticate #
- Once all settings match the requirements, click the orange Submit button at the bottom left of the page.
- A Security Verification window will appear; enter your 6-digit Google 2FA Code to proceed.
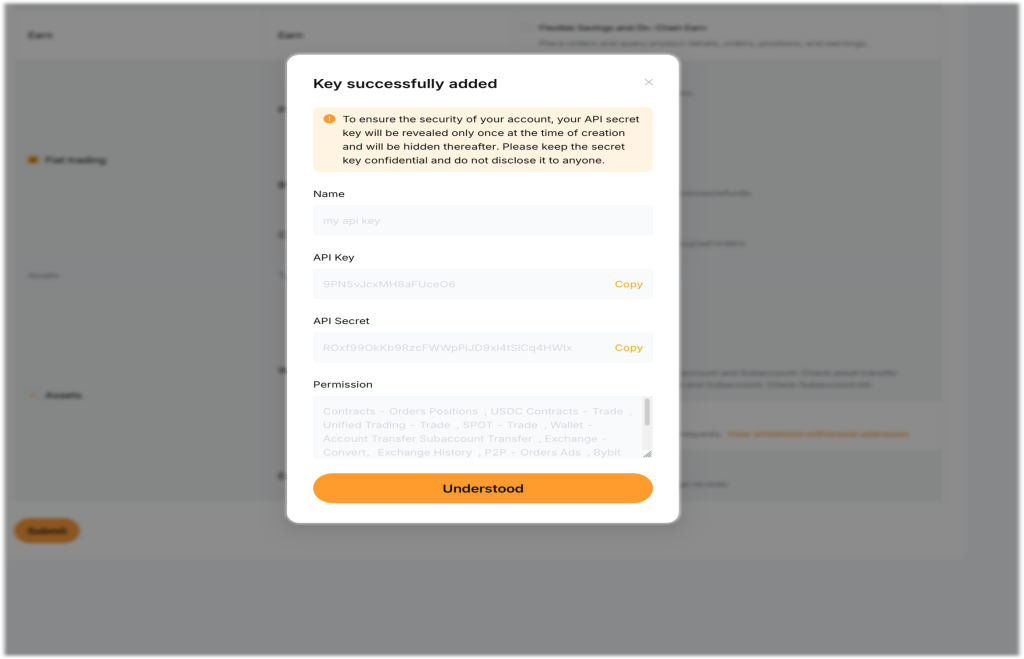
Step 6: Save Your Keys #
- A confirmation window will appear showing “Key successfully added”.
- Your new API Key and API Secret will be displayed on the screen.
- Crucial Step: Copy and paste both keys into your third-party application immediately, as the Secret Key will be hidden after this step.
- Click the orange Understood button to finish the setup.